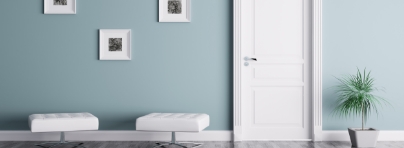
BEST Existing Wall Soundproofing Assembly Soundproofing Methods
This is the best assembly for improving the soundproofing performance of an existing wall. Use this assembly to reduce airborne and structural borne noise transfer between to rooms. This type of construction is perfect for retro fitting existing walls in home theaters, recording studios, walls adjacent to stairs/elevators and industrial machine rooms. This solution reduces low frequency noise from subwoofers and drums.
Instructions for Installation- Best Soundproofing Assembly
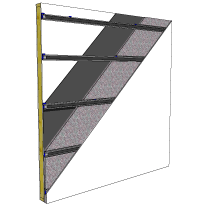
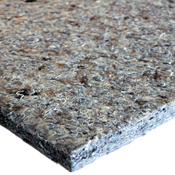
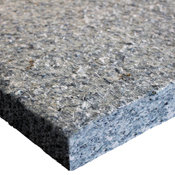
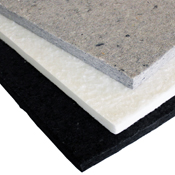
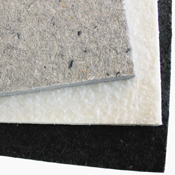
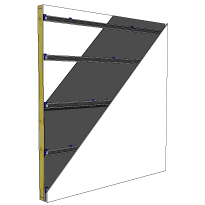
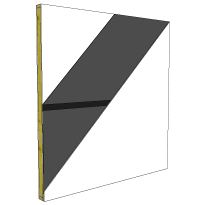
1. Use a stud finder to locate the studs within the wall. Mark the studs with a chalk line.2. Install the Quiet Barrier® HD onto the wall surface with 1 ¼ inch roofing nails. Butt the edges of the Quiet Barrier® HD tightly together. Try to minimize the amount of seams.
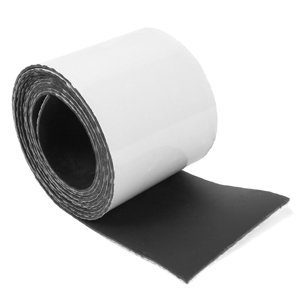
3. Peal and place the Quiet Barrier® Tape over all of the seams of the Quiet Barrier®.
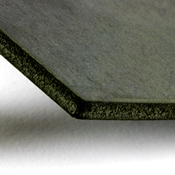
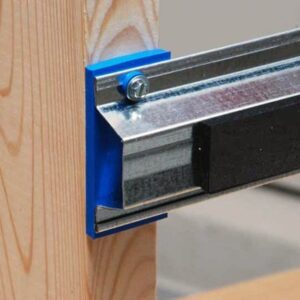
4. Install the isoTRAX® Soundproofing System over the barrier layer.
5. Install the Echo Absorber™ Acoustic Panels between the isoTRAX® rails.
6. Install 5/8 inch Type X gypsum board on to the isoTRAX® system with 1 ¼ inch fine thread drywall screws. Screws should be placed 12 inches apart. Leave a ¼ inch gap between the new layer of gypsum board and all adjoining wall, ceiling and floor surfaces.
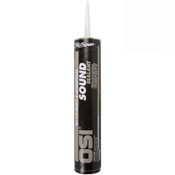
7. Fill the ¼ inch gap with OSI® Pro-Series® SC-175™ Acoustical Sound Sealant. Finish the gypsum board using common industry standards.
Note: For increased performance add another layer of 5/8 inch Type X Gypsum board.
This assembly is perfect for shared walls in condominiums and apartments and a cost effective alternative to our best assembly. Use this assembly to reduce airborne and structural borne noise transfer between two rooms. This type of construction is a good retro fit solution for a variety of spaces from bedrooms to mechanical/machinery rooms.
Instructions for Installation- Better Soundproofing Assembly
1. Use a stud finder to locate the studs within the wall. Mark the studs with a chalk line.2. Install the Quiet Barrier® HD onto the wall surface with 1 ¼ inch roofing nails. Butt the edges of the Quiet Barrier® HD tightly together. Try to minimize the amount of seams.
3. Peal and place the Quiet Barrier® Tape over all of the seams of the Quiet Barrier®.
4. Install the isoTRAX® Soundproofing System over the barrier layer.
5. Install 5/8 inch Type X gypsum board on to the isoTRAX® system with 1 ¼ inch fine thread drywall screws. Screws should be placed 12 inches apart. Leave a ¼ inch gap between the new layer of gypsum board and all adjoining wall, ceiling and floor surfaces.
6. Fill the ¼ inch gap with OSI® Pro-Series® SC-175™ Acoustical Sound Sealant.
7. Finish the gypsum board using common industry standards.
Note: For increased performance add another layer of 5/8 inch Type X Gypsum board.
GOOD Existing Wall Soundproofing Assembly Soundproofing Methods
This assembly will improve the noise blocking performance of a wall that already exists. Use this assembly to reduce minimal amounts of noise transfer between two rooms. This type of construction will reduce sounds like people talking and TV/Stereo at low volumes.
Instructions for Installation- Good Soundproofing Assembly
Method A: attaching the Quiet Barrier® HD directly to the wall surface.
1. Use a stud finder to locate the studs within the wall. Mark the studs with a chalk line.
2. Install the Quiet Barrier® HD onto the wall surface with 1 ¼ inch roofing nails. Butt the edges of the Quiet Barrier® HD tightly together. Try to minimize the amount of seams.
3. Peal and place the Quiet Barrier® Tape over all of the seams of the Quiet Barrier®.
4. Install 5/8 inch Type X gypsum board with 2 inch coarse thread drywall screws. Screws should be placed 8 to 12 inches apart. Make sure the screws penetrate the studs within the wall. Leave a ¼ inch gap between the new layer of gypsum board and all adjoining wall, ceiling and floor surfaces.
5. Fill the ¼ inch gap with OSI® Pro-Series® SC-175™ Acoustical Sound Sealant. Finish the gypsum board using common industry standards.
Note: For increased performance add another layer of 5/8 inch Type X Gypsum board.
Method B: Attaching the Quiet Barrier® HD to the Back of the Gypsum Board.
1. Use a stud finder to locate the studs within the wall. Mark the studs with a chalk line.
2. Lay the drywall face down on to a clean dry surface. Apply a ¼ inch bead PL Construction adhesive around the perimeter of the backside of the drywall. Apply the adhesive approximately 2 inches from the edge of the drywall. Create an X pattern corner to corner and place a few 1 inch “globs” of glue with the field.
3. Place the Quiet Barrier® material onto the back side of the drywall. To ensure good contact with the adhesive, use a hand roller to apply pressure. Let the adhesive cure for 24 hours before installation.
4. Place the first sheet of drywall / Quiet Barrier® composite vertically on the wall. Leave a ¼ inch gap between the new layer of gypsum board and all adjoining wall, ceiling and floor surfaces.
5. Attach the drywall with 2 inch coarse thread drywall screws. Be sure the screws penetrate the studs within the wall assembly. Screws should be placed 8 to 12 inches apart.
6. Fill the ¼ inch gap with OSI® Pro-Series® SC-175™ Acoustical Sound Sealant. Finish the gypsum board using common industry standards.
Note: For increased performance add another layer of 5/8 inch Type X Gypsum board.
I have emailed a lot of different manufactures and I have to say your customer service is head and shoulders above all of them. I emailed your company at about 9pm my time and when I woke up the next morning you had already answered my question and then the follow up was a few hours later. I am impressed. Thanks a lot for the quick turn around!
Are you a contractor, architect, designer, or engineer?
Join our Preferred Herd for exclusive access to pro-only promos, soundproofing strategies, and cutting-edge product developments.
Sign up today and get early access to our 30th Birthday Celebration + 15% off.
X
Free Shipping on Orders of 6 or More Quiet Wrap Pipe Soundproofing Wraps. Use Coupon Code WRAP440. Shop Now *Standard Shipping in the Continental US only