0 ItemsView Cart


Ceiling Soundproofing Products
isoTRAX® Soundproofing System Ceiling Package
$241.85
Quiet Batt® Soundproofing Insulation
$120.00
Quiet Barrier® MD (w/PSA) Soundproofing Material (Sheet)
$139.99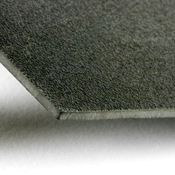
Quiet Barrier® MD Soundproofing Material (Sheet)
$74.99 $68.99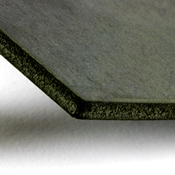
Quiet Barrier® HD Soundproofing Material (Sheet)
$145.99 $137.99
Green Glue Noiseproofing Compound (Case of 12)
$
Resilmount™ Isolation Hanger – 120lb
$6.25
Resilmount™ Isolation Hanger – 200lb
$6.25
Resilmount™ Isolation Hanger – 65lb
$6.25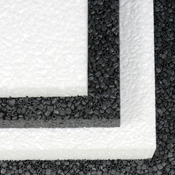
Quiet Board™ Acoustic Panel 1″ (Case of 13)
$1143.86You can effectively soundproof a ceiling by installing a vibration isolation system and adding soundproofing materials, such as acoustic panels or insulation, to minimize sound transmission from the room above. Soundproof Cow carries a variety of acoustic materials to use when soundproofing a ceiling, including insulation, soundproof barriers, sound isolation systems and more. If you would like to discuss your project, contact our herd of soundproof experts!


Ceiling Soundproofing Treats Two Types of Ceiling Noise
Impact noise is the result of people walking in the room above. Footfall causes vibrations in the floor. These vibrations pass through the ceiling of the room below.
Airborne noise is the sound from the room above, whether it’s people talking, a loud TV or thumping music.
Both types of noise enter the room through the ceiling, the part of the room that joins the two spaces. But noises also travel through ceiling joists and beams. This means noise from several levels above can still enter the space and cause issues. Soundproofing a ceiling reduces the noise that enters the space from any room above, whether it’s impact or airborne noise.


Two types of Ceilings to Soundproof
Learn about the best ceiling soundproofing methods for drywall and suspended ceilings below.
Drywall Ceiling Soundproofing
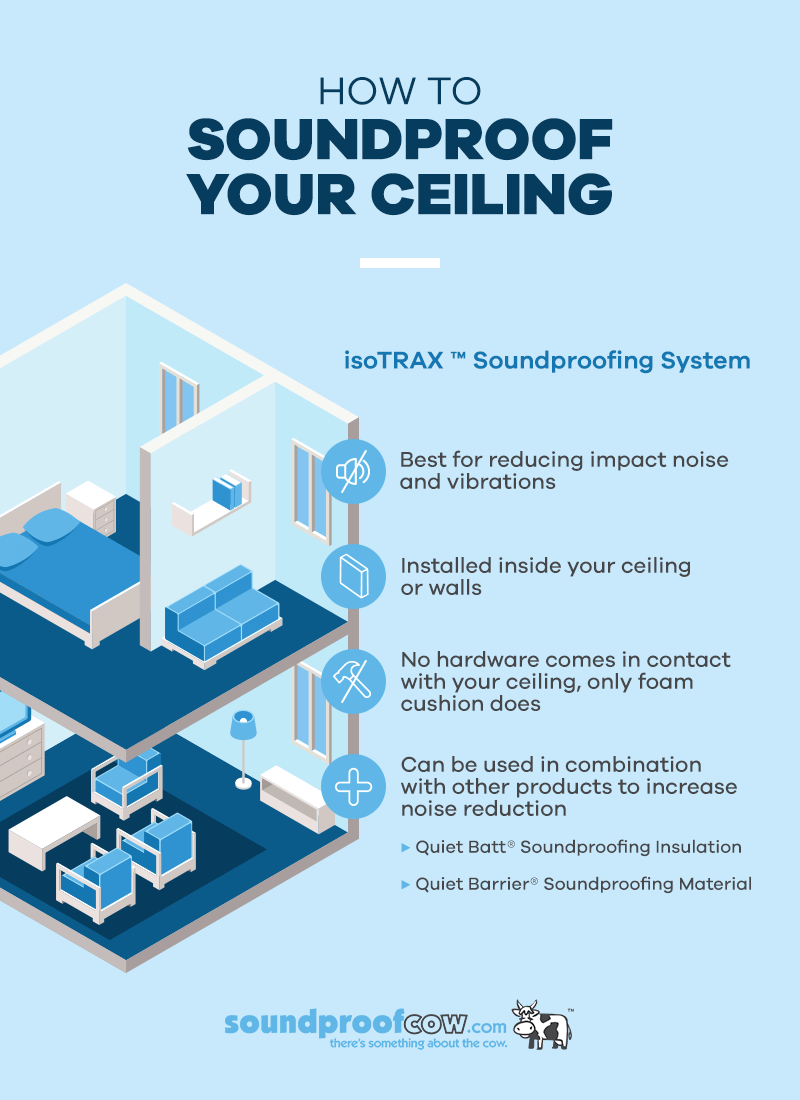
By suspending a new drywall ceiling from a vibration isolation system, like isoTRAX ® Soundproofing System, impact and airborne noise are greatly reduced.
isoTRAX ® Soundproofing System works by “floating” the ceiling over vibration isolators. With no hardware making direct contact with the ceiling, the new drywall only comes in contact with an isolating foam cushion. Sound energy has no path to travel along, stopping its transmission.
To combat airborne noise further, a second material can be added, such as Quiet Batt® Soundproofing Insulation. This dense, recycled, cotton material is installed between ceiling joists, eliminating the vibrations of sound between the ceiling construction. Quiet Batt® Soundproofing Insulation not only reduces sound, it also insulates.
Another way to decrease airborne noise is to add a heavy, thick material to trap sound energy and stop it from traveling to another room. Quiet Barrier® soundproofing material is a high density, non-porous material that is flexible and easy to install. This is the best choice when airborne noise is the main sound issue in a room.
Quiet Barrier® Soundproofing Material can be nailed across joists and sealed with acoustic caulk, like OSI® Pro-Series® SC-175 ™ Acoustical Sound Sealant, before the drywall is installed. Although Quiet Barrier® Soundproofing Material® is available in a 2-pound weight, it’s too heavy for ceiling use.
To achieve the best ceiling soundproofing with Quiet Barrier® Soundproofing Material, use in combination with Quiet Batt® Soundproofing Insulation.
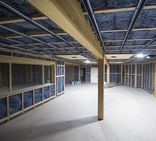
Suspended Ceiling Soundproofing – Soundproof Ceiling Tiles
The most effective method for soundproofing a suspended ceiling is to remove the current ceiling and install a drywall ceiling with our isoTRAX® Soundproofing System.
isoTRAX® Soundproofing System works by “floating” the ceiling over vibration isolators. No hardware makes direct contact with the ceiling. The new drywall only comes in contact with an isolating foam cushion. Sound energy is stopped because it has no path to travel along.
Another ceiling soundproofing solution is replacing ceiling tiles with acoustical tiles. Acoustical tiles reduce airborne noise and improve the sound quality within a room by absorbing sound waves and eliminating echoes.
To be able to compare the performance of different sound absorbing ceiling panels, we rate them by how much sound they can block. This rating is called CAC, which stands for Ceiling Attenuation Class. The higher the rating, the more effective the product is.
If existing ceiling tiles can’t be replaced, we recommend placing a layer of Quiet Batt® Soundproofing Insulation above the tiles.
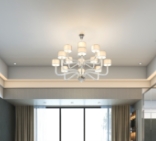
Soundproof Panels for Ceilings
Adding soundproof panels to your ceiling is an excellent way to improve the acoustics in a room and reduce excess sound. Acoustic panels work by absorbing sound waves, creating a more pleasant and echo-free environment.
It’s essential to find the right type of panel to get the best performance. The best choice for your needs will depend on a range of factors, including the type of room and the activities that occur in the space. While acoustic panels work well in various spaces, larger rooms often benefit from soundproofing ceiling panels for sound absorption and speech-clarifying qualities.
A few types of acoustic panels you can use for soundproofing a ceiling include:
- Art panels: Our acoustic art panels are made with soundproof ceiling material that offers sound deadening and absorption qualities. You can hang these customizable soundproof panels from ceilings to absorb sound waves while adding a stylish element to your decor. Acoustic art panels are an ideal option when you want to soundproof a space without altering the existing structure.
- Fabric-wrapped panels: Our fabric-wrapped panels, such as the Udderly Quiet® Acoustic Panels, can hang on ceilings to prevent sound from bouncing back. They are especially effective in reducing echo in rooms with high ceilings. The Udderly Quiet® Acoustic Cloud is an ideal choice for sound control. The lightweight hanging panel offers vibration reduction and sound clarifying qualities, and it’s easy to install in any room. The fabric comes in a wide variety of colors and textures to match your decor.
- Perforated acoustic wood panels: These soundproof ceiling panels can be mounted to the ceiling or suspended like a cloud. Acoustic wood panels diffuse sound, decrease reverberation and reduce noise levels produced by speakers. You can choose from a wide selection of panels, each with its own unique and appealing patterns that can enhance the appearance of any room.
Soundproof Ceiling Tiles Won’t Let the People Upstairs Interrupt Your Pleasant Dreams
Ceilings are great things — they keep you nice and dry when there’s a raging thunderstorm outside and stop walnut-sized hail from cracking your laptop or iPhone screen. Unfortunately, though, ceilings can’t keep out invisible things like ghosts and sound waves. While we can definitely help you keep out sound waves, you’ll have to contact those guys on “Ghost Hunters” to make dead Uncle Ned go away for good.
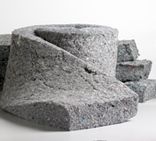
Quiet Board™ soundproof ceiling tiles are sound-absorbing and deflecting acoustic panels composed of compressed, Styrofoam-like, cylindrical beads. Inside these beads are hollow cores that guide sound waves into panels for rapid absorption and noise reduction. Lightweight, fiber-free and washable, Quiet Board™ is also fungi and bacteria resistant so it’s great for use in medical facilities as well as your home or apartment. You can also install these nifty soundproof ceiling tiles as wall panels or hanging baffles wherever noise is a problem.
With its irregular texture and dense core material (polypropylene), Quiet Board™ absorbs and deflects 50 percent of all airborne noise back toward the source of the noise. Containing no fiberglass to irritate your skin or your respiratory system, Quiet Board™ attaches to a variety of ceiling surfaces and can be cut to fit using a small circular saw or serrated knife. The Class A™ flammability rating is suitable for almost all Commercial applications. Quiet Board™ is such a versatile and effective noise reducing product, you’ll find it used in a number of places ranging from auditoriums, food processing facilities, classrooms, laboratories and even gun ranges. The water resistant nature of the material makes it a great option for kennels and veterinary offices as well.
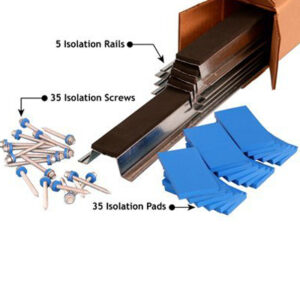
Our IsoTrax® Soundproofing System Ceiling Package is another popular option to employ rather than wasting time squabbling with your upstairs neighbors over their practicing the Irish Jig at dawn. This soundproof ceiling package contains additional hardware and Isolation pads verses the standard soundproofing system to accommodate the additional weight of ceilings. The IsoTrax® package installs inside your ceilings or walls to reduce vibration and structural borne noise.
Benefits of a Soundproof Ceiling You Might Not Have Thought About
Consider these facts about using soundproof ceiling tiles:
- Acoustic ceiling tiles can be cleaned easily with soap and water, and they resist impact. That means you don’t have to worry about putting hyperactive toddlers, their toys and their snacks in a room quieted with acoustic tiling.
- If you’ve never invited people down to your basement for a raucous party because the ceiling is an unsightly mess of pipes, wires and all that other ugly basement stuff, sound proof ceiling tiles can hide those pipes and wires. They also make it a lot easier for you to remodel or make repairs when your more rambunctious parties get a little out of hand.
- Bathrooms are really noisy places, with people taking long showers, blow-drying hair to perfection, slamming vanity doors — and you can’t say you’ve never cringed when you’ve somebody drop the toilet seat. If your bathroom ceiling were soundproofed, the people above or below the bathroom (or bathrooms) wouldn’t have to cringe as much.
We have more benefits of soundproofing ceilings, but give us a call to find out what they are. You can also find out more about the great, DIY soundproofing products we have in stock to address all your noise problems.
Learn More About Soundproofing Ceilings
New Ceilings vs Existing Ceilings


I just wanted to send a quick thank you for your rapid response and helpfulness. I very much appreciated it. You have been responsive in every way all through the process. It has been a pleasure doing business with you and your company.
- T. Alexander