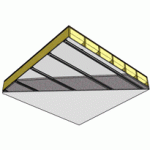
BEST Existing Ceiling Soundproofing Assembly Soundproofing Methods
Instructions for Installation – Best Existing Ceiling Soundproofing
1. Use a stud finder to locate the joists within the ceiling. Mark the joists with a chalk line.
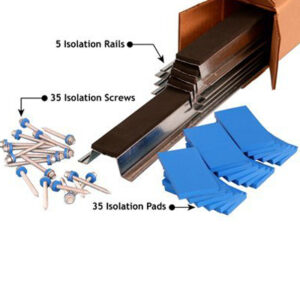
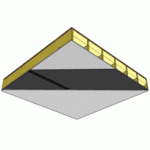
2. Using the chalk lines as a guide, install the isoTRAX® Soundproofing System onto the existing ceiling surface.
3. Install the Echo Absorber™ Acoustic Panels between the isoTRAX® rails.
4. Install ½ inch Type X gypsum board on to the isoTRAX® system with 1 ¼ inch fine thread drywall screws. Screws should be placed 8 inches apart. Leave a ¼ inch gap between the new layer of gypsum board and all adjoining wall, ceiling and floor surfaces.
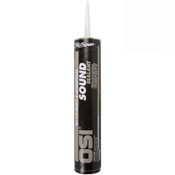
5. Fill the ¼ inch gap with OSI® Pro-Series® SC-175™ Acoustical Sound Sealant.
6. Finish the gypsum board using common industry standards.
Note: For increased performance add another layer of 5/8 inch Type X Gypsum board.
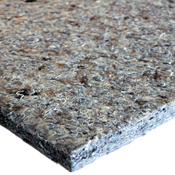
GOOD Existing Ceiling Soundproofing Assembly Soundproofing Methods
Instructions for Installation – Good Existing Ceiling Soundproofing
1. Use a stud finder to locate the joists within the ceiling. Mark the joists with a chalk line.
2. Lay the ½ inch drywall face down on to a clean dry surface. Apply a ¼ inch bead PL Construction Adhesive around the perimeter of the backside of the drywall. Apply the adhesive approximately 2 inches from the edge of the drywall. Create an X pattern corner to corner and place a few 1 inch “globs” of glue with the field.
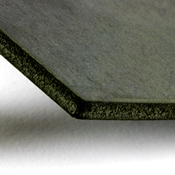
3. Place the Quiet Barrier® material onto the back side of the drywall. To ensure good contact with the adhesive, use a hand roller to apply pressure. Let the adhesive cure for 24 hours before installation.
4. Attach the drywall / Quiet Barrier® composite with 2 inch coarse thread drywall screws. Be sure the screws penetrate the joists within the wall assembly. Screws should be placed 8 to 12 inches apart.
5. Leave a ¼ inch gap between the new layer of gypsum board and all adjoining wall, ceiling and floor surfaces.
6. Fill the ¼ inch gap with OSI® Pro-Series® SC-175™ Acoustical Sound Sealant.
7. Finish the gypsum board using common industry standards.
Note: For increased performance add another layer of 5/8 inch Type X Gypsum board.
Are you a contractor, architect, designer, or engineer?
Join our Preferred Herd for exclusive access to pro-only promos, soundproofing strategies, and cutting-edge product developments.
Sign up today and get early access to our 30th Birthday Celebration + 15% off.
X
Free Shipping on Orders of 6 or More Quiet Wrap Pipe Soundproofing Wraps. Use Coupon Code WRAP440. Shop Now *Standard Shipping in the Continental US only