
 BEST New Wall Soundproofing Assembly
BEST New Wall Soundproofing Assembly Soundproofing Methods
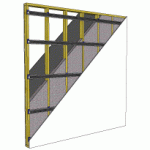
This is the best assembly for improving the soundproofing performance of newly constructed stud walls. Use this assembly to reduce airborne and structural borne noise transfer between two rooms. This type of construction is perfect for walls in home theaters, recording studios, walls adjacent to stairs/elevators and industrial machine rooms. This solution reduces low frequency noise from subwoofers and drums.
Instructions for Installation- Best New Wall
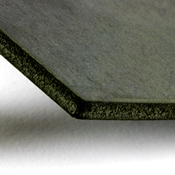
1. On one side of the wall, install the Quiet Barrier® HD onto the studs with 1 ¼ inch roofing nails. Butt the edges of the Quiet Barrier® HD tightly together. Try to minimize the amount of seams.
2. Peal and place the Quiet Barrier® Tape over all of the seams of the Quiet Barrier®.
3. Install 5/8 inch Type X gypsum board with 1 5/8 inch coarse thread drywall screws. Screws should be placed 8 to 12 inches apart. Leave a ¼ inch gap between the new layer of gypsum board and all adjoining wall, ceiling and floor surfaces.
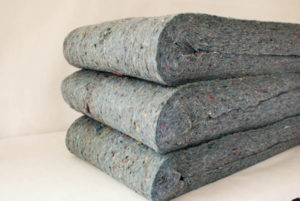
4. Install the Quiet Batt® between the studs.
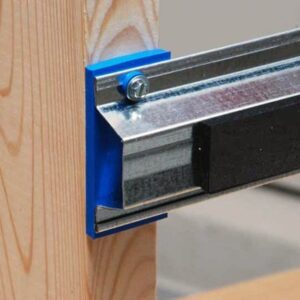
5. On the other side of the wall, install the isoTRAX® Soundproofing System on to the studs.
6. Install 5/8 inch Type X gypsum board on to the isoTRAX® system with 1 ¼ inch fine thread drywall screws. Screws should be placed 12 inches apart. Leave a ¼ inch gap between the new layer of gypsum board and all adjoining wall, ceiling and floor surfaces.
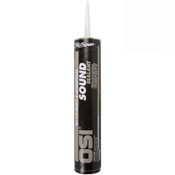
7. Fill the ¼ inch gap with OSI® Pro-Series® SC-175™ Acoustical Sound Sealant.
8. Finish the gypsum board using common industry standards.
Note: For increased performance add another layer of 5/8 inch Type X Gypsum board.
 BETTER New Wall Soundproofing Assembly
BETTER New Wall Soundproofing Assembly Soundproofing Methods
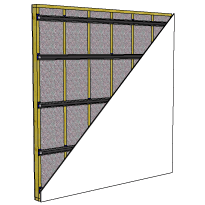
This assembly is perfect for shared walls in condominiums and apartments and a cost effective alternative to our best assembly. Use this assembly to reduce airborne and structural borne noise transfer between two rooms. This type of construction is a good solution for a variety of spaces from bedrooms to mechanical/machinery rooms.
Instructions for Installation- Better New Wall
1. Install the Quiet Batt® between the studs.
2. Install the isoTRAX® Soundproofing System on to the studs with provided hardware.
3. Install 5/8 inch Type X gypsum board on to the isoTRAX® system with 1 ¼ inch fine thread drywall screws. Screws should be placed 12 inches apart. Leave a ¼ inch gap between the new layer of gypsum board and all adjoining wall, ceiling and floor surfaces.
4. Fill the ¼ inch gap with OSI® Pro-Series® SC-175™ Acoustical Sound Sealant.
5. Finish the gypsum board using common industry standards.
Note: For increased performance add another layer of 5/8 inch Type X Gypsum board.
 GOOD New Wall Soundproofing Assembly
GOOD New Wall Soundproofing Assembly Soundproofing Methods
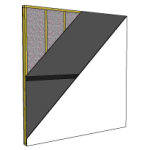
This assembly will improve the noise blocking performance of a newly constructed wall. Use this assembly to reduce minimal amounts of noise transfer between two rooms. This type of construction will reduce sounds like people talking and TV/Stereo at low volumes.
Instructions for Installation- Good New Wall
Method A: Attaching the Quiet Barrier® HD directly to the studs.
1. Install the Quiet Batt® between the studs.
2. Install the Quiet Barrier® HD onto the studs with 1 ¼ inch roofing nails. Butt the edges of the Quiet Barrier® HD tightly together. Try to minimize the amount of seams.
3. Peal and place the Quiet Barrier® Tape over all of the seams of the Quiet Barrier®.
4. Install 5/8 inch Type X gypsum board with 1 5/8 inch coarse thread drywall screws. Screws should be placed 8 to 12 inches apart. Leave a ¼ inch gap between the new layer of gypsum board and all adjoining wall, ceiling and floor surfaces.
5. Fill the ¼ inch gap with OSI® Pro-Series® SC-175™ Acoustical Sound Sealant.
6. Finish the gypsum board using common industry standards.
Note: For increased performance add another layer of 5/8 inch Type X Gypsum board.
Method B: Attaching the Quiet Barrier® HD to the Back of the Gypsum Board.
1. Install the Quiet Batt® between the studs.
2. Lay the 5/8 inch drywall face down on to a clean dry surface. Apply a ¼ inch bead PL Construction adhesive around the perimeter of the backside of the drywall. Apply the adhesive approximately 2 inches from the edge of the drywall. Create an X pattern corner to corner and place a few 1 inch “globs” of glue with the field.
3. Place the Quiet Barrier® material onto the back side of the drywall. To ensure good contact with the adhesive, use a hand roller to apply pressure. Let the adhesive cure for 24 hours before installation.
4. Place the first sheet of drywall / Quiet Barrier® composite vertically on the studs. Leave a ¼ inch gap between the new layer of gypsum board and all adjoining wall, ceiling and floor surfaces.
5. Attach the drywall with 1 5/8 inch coarse thread drywall screws. Screws should be placed 8 to 12 inches apart.
6. Fill the ¼ inch gap with OSI® Pro-Series® SC-175™ Acoustical Sound Sealant.
7. Finish the gypsum board using common industry standards.
Note: For increased performance add another layer of 5/8 inch Type X Gypsum board.


 Free Acoustic Analysis
  Soundproofing Questionnaire