

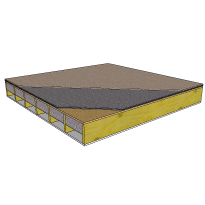
 BEST Carpet Soundproofing Assembly
BEST Carpet Soundproofing Assembly Soundproofing Methods
This is the best assembly for improving the soundproofing performance of carpeted floors. Use this assembly to reduce impact noise (foot fall) and airborne noise transfer between two rooms with an adjoining floor/ceiling. This type of construction is perfect for floors in multi-family dwellings such as condominiums and apartment buildings. Other applications include floors for home theater and home recording studio environments. Back to How to Soundproof a Floor
Best Carpet Soundproofing Assembly Products
1. Install the tack strip where needed.
2. After removing all of the toe mold, apply the Acoustic Sealant around the entire perimeter of the room and seal all cracks and holes.
3. Make sure the sub-floor surface is clean, dry, and free of obstructions.
4. Install the Impact Barrier QT HD up to the tape strip.
5. Tape all of the seams with a high quality duct tape.
6. Install the carpet and pad using common industry standards. Note: For increased performance add Quiet Batt® Soundproofing Insulation between the floor joists.
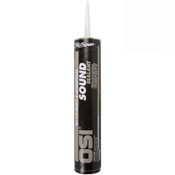
OSI® Pro-Series SC-175 Acoustical Sound Sealant (Tube)
$17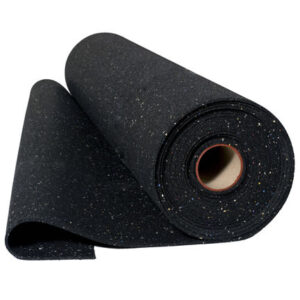
Impact Barrier QT Flooring Underlayment
$175.99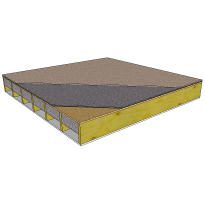 GOOD Carpet Soundproofing Assembly
GOOD Carpet Soundproofing Assembly Soundproofing Methods
Using this assembly of products will improve the soundproofing performance of carpeted floors and is a cost effective alternative to our best assembly. Use this assembly to reduce impact noise (foot fall) and airborne noise transfer between two rooms with an adjoining floor/ceiling. This type of construction is good solution for floors in multi-family dwellings such as condominiums and apartment buildings. Back to How to Soundproof a Floor
Good Carpet Soundproofing Assembly Products
1. Install the tack strip where needed.
2. After removing all of the toe mold, apply the Acoustic Sealant around the entire perimeter of the room and seal all cracks and holes.
3. Make sure the sub-floor surface is clean, dry, and free of obstructions.
4. Install the Impact Barrier QT MD up to the tape strip.
5. Tape all of the seams with a high quality duct tape.
6. Install the carpet and pad using common industry standards. Note: For increased performance add Quiet Batt® Soundproofing Insulation between the floor joists.

OSI® Pro-Series SC-175 Acoustical Sound Sealant (Tube)
$17
Impact Barrier QT Flooring Underlayment
$175.99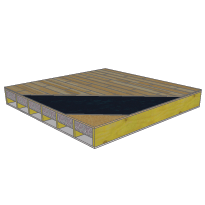 BEST Laminate Floor Soundproofing Assembly
BEST Laminate Floor Soundproofing Assembly Soundproofing Methods
This is the best assembly for improving the soundproofing performance of Laminate floors. Use this assembly to reduce impact noise (foot fall) and airborne noise transfer between two rooms with an adjoining floor/ceiling. The Step Above® product in this assembly will also make the laminate floors sound more like hardwood. This type of construction is perfect for floors in multi-family dwellings such as condominiums and apartment buildings. Back to How to Soundproof a Floor
Best Laminate Soundproofing Assembly Products
1. Apply the Acoustic Sealant around the entire perimeter of the room. Seal all cracks and holes.
2. Make sure the sub-floor surface is clean, dry and free of obstructions.
3. Start in a corner. Unroll the Impact Barrier QT® flooring underlayment over the sub-floor with the vapor barrier film side down. Be sure the tape side is next to the wall and the overlapping lip is toward the open room.
4. Roll out the next row in the same manner. Butt the underlayment close to the first row. Be sure to overlap the vapor barrier lip and not the underlayment material.
5. Remove the tape liner from the bottom of the underlayment and secure it to the vapor barrier lip of the adjoining piece. Seal all open seams with an aggressive adhesive plastic tape.
6. Install the flooring per manufacturers instruction Note: For increased performance add Quiet Batt® Soundproofing Insulation between the floor joists.

OSI® Pro-Series SC-175 Acoustical Sound Sealant (Tube)
$17
Impact Barrier QT Flooring Underlayment
$175.99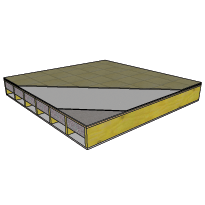 BEST Tile Floor Soundproofing Assembly
BEST Tile Floor Soundproofing Assembly Soundproofing Methods
This assembly will soundproof ceramic tile and marble floors. Using this assembly will reduce impact noise (foot fall) and airborne sound transmission between adjoining rooms connected by a ceiling/floor. This type of construction is perfect for floors in multi-family dwellings such as condominiums and apartment buildings. Back to How to Soundproof a Floor
Best Tile Floor Soundproofing Assembly Products
1. Make sure the sub-floor surface is clean, dry and free of obstructions.
2. Apply the Acoustic Sealant around the entire perimeter of the room. Seal all cracks and holes.
3. Stir or shake the PR 11 Primer thoroughly. Apply with the provided roller. The approximate dry time for the primer is 20 minutes. The surface should be tacky but does not transfer when touched.
4. Cut and fit the PROFLEX™ material with the release paper still attached.
5. Roll up ½ of the PROFLEX™ membrane, leaving the other half unrolled. Cut the release paper from the rolled portion of the membrane and slowly pull the release paper towards you, exposing the tacky surface.
6. Unroll the PROFLEX™ towards you, while pealing the release paper. Carefully unroll the material on to the primed floor, avoiding wrinkles, bubbles and overlapping. Follow the same procedure for the entire floor.
7. With a floor roller apply pressure to ensure good contact to the sub-floor surface.
8. Surfacing materials such as ceramic tile, porcelain tile, marble, stone or brick can be installed immediately after the PROFLEX™ material has been installed. The mortar should meet ANSI 118.4 as a minimum. Mastic should be a Type 1 or better.
9. Install the surfacing material following common industry standards. Note: For increased performance add Quiet Batt® Soundproofing Insulation between the floor joists.

OSI® Pro-Series SC-175 Acoustical Sound Sealant (Tube)
$17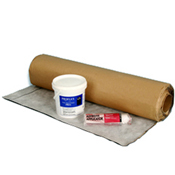
PROFLEX™ 90
$249.99
PR 11 Water Based Primer
$75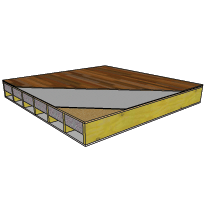 BEST Wood Floor Soundproofing Assembly
BEST Wood Floor Soundproofing Assembly Soundproofing Methods
This is a great assembly to soundproof hardwood floors. Using this assembly will reduce impact noise (foot fall) and airborne sound transmission between adjoining rooms connected by a ceiling/floor. This type of construction is perfect for floors in multi-family dwellings such as condominiums and apartment buildings. Back to How to Soundproof a Floor
Best Wood Floor Soundproofing Assembly Products
1. Make sure the sub-floor surface is clean, dry and free of obstructions.
2. Apply the Acoustic Sealant around the entire perimeter of the room. Seal all cracks and holes.
3. Stir or shake the PR 11 Primer thoroughly. Apply with the provided roller. The approximate dry time for the primer is 20 minutes. The surface should be tacky but does not transfer when touched.
4. Cut and fit the PROFLEX™ material with the release paper still attached.
5. Roll up ½ of the PROFLEX™ membrane, leaving the other half unrolled. Cut the release paper from the rolled portion of the membrane and slowly pull the release paper towards you, exposing the tacky surface.
6. Unroll the PROFLEX™ towards you, while pealing the release paper. Carefully unroll the material on to the primed floor, avoiding wrinkles, bubbles and overlapping. Follow the same procedure for the entire floor.
7. With a floor roller apply pressure to ensure good contact to the sub-floor surface. 8. Install the hardwood flooring following common industry standards. Note: For increased performance add Quiet Batt® Soundproofing Insulation between the floor joists.

OSI® Pro-Series SC-175 Acoustical Sound Sealant (Tube)
$17
PROFLEX™ 90
$249.99
PR 11 Water Based Primer
$75
I have emailed a lot of different manufactures and I have to say your customer service is head and shoulders above all of them. I emailed your company at about 9pm my time and when I woke up the next morning you had already answered my question and then the follow up was a few hours later. I am impressed. Thanks a lot for the quick turn around!
- E. Gustafson


 Free Acoustic Analysis
  Soundproofing Questionnaire