0 ItemsView Cart
August 29, 2023
If you have a noisy room in your home or office, acoustic panels can make the space more pleasant by absorbing soundwaves and eliminating echoes. However, you’ll need specific hardware like adhesives and Z-clips to secure these panels to surfaces.
After reading this guide, you will better understand what to use when installing your noise control products to ensure efficient and effective mounting.
Different Types of Acoustic Panel Mounting Hardware
There are several ways to fix or mount panels.
1. Adhesive
Two essential elements for adhesive mounts are construction adhesives, such as PL Premium Construction Adhesive, which is compatible with various materials, including drywall, wood, and concrete. The second is leveling brackets that offer load-bearing support.
For adhesive installations, you may forgo the permanent brackets for temporary ones to support the acoustic panels while the adhesive cures. Measure carefully before applying the adhesive. It may help you to draw guiding chalk lines on the wall. Typically, you can remove the temporary leveling brackets and wipe any guiding marks from the wall after allowing the adhesive to set for 24 hours.
2. Z-Clips and Z-Bars
As its name suggests, Z-clip hardware has the familiar shape of the letter “Z.” You can either interlock the panels’ clips to those on the wall or mount a Z-bar on the wall. Often, Z-clips for wood panels are aluminum, though you should choose ones with higher load capacity to accommodate the weight.
In most cases, your acoustic panels should come with Z-clip hardware, so all you need to do is measure, drill into the wall, install the clips or bars, and hang your panels.
3. Impaling Clips
For panels without backing and exposed mineral wool core, impaling clips offer an easy-to-use alternative to other installation methods. First, use construction adhesive or drill into the wall and screw the impaler or fasteners to the mounting surface.
Once you’ve secured the impaling clips, it is time to install the acoustic panels. Align the panels and press them onto the protruding teeth. If you want the panels to be permanent, add construction adhesive to the clip spikes and the back of the panel before applying them.
4. Hook and Loop
These nylon or polyester fasteners with soft and coarse sides lock together when joined. You need your acoustic panels, the supporting leveling brackets, and the provided hook-and-loop hardware components for this method.
Once you determine where the panel will go on the wall, install the leveling brackets for primary support. Then, mark where to install the hook pieces before exposing their adhesive backs and applying them to the wall.
Position the panel with its preinstalled loops and press firmly. The hooks will embed into the loop fibers, forming a tight bond. If you need to remove the panel, avoid pulling it off the wall. Instead, use a knife to loosen the hook-and-loop bonds gently. This mounting method is only recommended for smaller panels.
5. Cloud, Baffle and Ceiling Installation
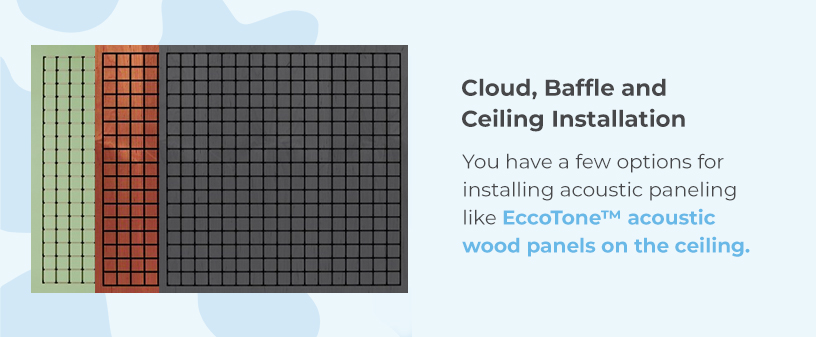
You have a few options for installing acoustic panels like EccoTone™ acoustic wood panels on the ceiling. The first is to suspend the panel, or cloud, with light-duty chains. You need to attach an iron runner to the back to secure the chains.
Then, you need to take ceiling measurements and install either S-hooks or eye bolts, depending on the panels’ weight and size. If using eye bolts, you can employ quick links to fasten the chains.
Finally, you can use mounting brackets or adhesive, as you would with a wall-mounted panel. For adhesive installation, you should install long nails at an angle, which you can remove after setting the panel.
Like cloud panels, an acoustic baffle hangs vertically from the ceiling to reduce reverberation in a room. Purchasing panels with grommets intended for this purpose is best unless you want to screw holes into your acoustic panels to insert hooks. Position your sound baffles and attach them to the roof as you would with a cloud.
How to Know Which Type to Use for Your Installation
The answer depends on what kind of acoustic panels you have, where you wish to hang them and whether you anticipate needing to remove them.
Should You Use Adhesive?
Consider using an adhesive when you want a straightforward permanent mounting solution with limited technical knowledge. This option is excellent if you own a building or the lease agreement permits you to make such alterations. Choose this hardware if your surface is prone to impact stresses such as cracking. Also, since the panels are flush with the mounting surface and protrude far less than other methods, they are ideal for small spaces and high traffic.
Is Z-Clip Mounting Hardware Right for You?
Z-clip mounting hardware is excellent when you want secure hanging with the ability to easily remove and rehang the paneling. Z-clips are great for multipurpose rooms where the panels cannot remain on the walls permanently. If you need to secure the panels with minimal structural damage, you can plaster or fill any holes with putty and repaint later.
You need to use the recommended Z-clips, potentially combined with a Z-bar, to adequately accommodate the panel weight. Otherwise, the bond between the panel and the Z-clip may experience peel-away stress.
Would Impaling Clips Be Ideal?
Impaling clips are suitable for Fiberglas or similar acoustic panel materials where screwing into them is not a viable option. Install the impaling clips on the walls, align the panels, and press them onto the clips’ teeth.
This hardware offers a quick and convenient method of mounting panels with limited damage to walls. Impaling clips are a good solution if you intend to mount the panels and leave them up for extended periods. If you regularly remove them, strongly consider Z-impaler clips, as shimming with impaler clips is near impossible and you will need to remove and realign the panel.
Should You Use Hook and Loop?
Use hook-and-loop mounting hardware with smaller, lighter panels for minimal wall damage. This hardware option has weight limitations, and if you exceed them, the panels will gradually peel off over time due to gravity.
Hook-and-loop mounting is a highly convenient method for temporary panels. Still, be aware that achieving perfect alignment can be tricky, as you can’t easily shim the panels once the hooks and loops interlock.
Are Cloud, Baffle, and Ceiling Panels Appropriate?
Depending on the panel type, you can attach them to the walls or ceiling using appropriate adhesive or suspending them with chains as clouds. In larger or low-ceilinged spaces, installing ceiling panels and clouds is a brilliant solution to dampen the sound further to avoid echoes and reverb.
If you install clouds or use adhesive on larger panels, consider the location of joints, as the last thing you want is for the ceiling to sag. If you need to accommodate existing fixtures such as lighting, air conditioning, and sprinkler systems, suspending clouds is the wiser choice.
Height placement is essential for baffles to absorb sound. Additionally, the number of baffles, spacing, and direction depends on the room.
Moove Your Project Along With Soundproof Cow Acoustic Panels
Now that you understand the various types of mounting hardware, consider which aesthetically pleasing Soundproof Cow acoustic panels you will use to diffuse and absorb sound in your space. Whether you are setting up a home recording studio, working on the acoustics for a high-end restaurant or renovating a large conference room, we have the panels for you.
Our range of acoustic panels will help with all your noise reduction needs and improve sound quality and clarity while complementing your other design elements. Join these happy customers who chose to seize the mooment and get in touch with us to discuss your acoustic and soundproofing needs!

About Kellen Beaver