Sound waves are a vocal artist’s worst enemy in the vocal booth. You can record your best work, but the recording will pick up more than your vocal genius — it will capture the outside sound of the neighbor’s lawnmower, or the interior reverberations bouncing off walls and ceilings.
Musicians, podcasters, singers, radio personalities and other vocal artists can benefit from an acoustically-treated vocal booth. Whether you’re in the process of building a vocal booth or looking to add a few upgrades, we’ve got the top acoustic treatments that will hit the “mooote” button on any unwanted noise!
Request a Free Acoustic Panel Quote
How Much Acoustic Treatment Coverage Do Vocal Booths Need?
Vocal booth acoustic treatments absorb sound waves, creating a sought-after “dry” sound with little to no reverberations. As a general rule of thumb, cover between 50 to 70% of your vocal booth’s surface area with one- to two-inch thick acoustic foam. The drier the sound you want, the more coverage you need.
If you’re recording radio, commercial, podcasts or other similar vocal types, you’ll want some extra coverage to create a drier, tighter sound. On the other hand, if you’re a musician or singer recording songs, you’ll want to give soundwaves more freedom to reflect and keep the sound live.
Best Acoustic Foam for Vocal Booths
One-inch-thick acoustic foam is ideal for casual vocalists or those on a budget. But, if you’re a dedicated vocalist and have the financial means, we recommend two-inch acoustic foam for its comparatively superior frequency absorption. Avoid purchasing foam that’s too thick, though, or else your acoustic vocal booth will result in “dead” sound quality.
Where Should You Place Acoustic Treatments in Vocal Booths?
Walls and ceilings are the two crucial areas where you should place acoustic treatments in your vocal booth. You’ll also want to prevent other everyday noise pollutants, such as sounds from downstairs or your neighbor’s blaring TV, by soundproofing your floors and doors.
The good news is that you don’t have to add acoustic panels to your entire vocal booth. Instead, you should strategically place acoustic treatments in the following areas.
1. Walls
Sound waves bounce off flat surfaces, such as walls, like bouncy balls. And, just as bouncy balls eventually lose energy and stop bouncing, sound waves do, too. These projecting soundwaves interfere with your recording quality, especially at reflection points.
Reflection points are areas where you’re speaking, playing or singing toward. Your sounds will bounce right back to you, which you can avoid by using sound-absorbent acoustic panels. Covering your walls starting 28 to 32 inches from the floor is the ideal placement for the acoustic material.
2. Floors
You don’t need to focus too much attention on floor acoustic treatments, but we recommend taking soundproofing measures to limit penetrating day-to-day sounds.
Some flooring materials, namely hardwood, ceramic tiles and laminate, give sound waves the ultimate playground to bounce or seep through from other rooms, which dampens your recording quality. You can limit these impairing sounds by adding a protective soundproofing layer under your flooring.
3. Ceilings
Ceilings generate a noisy vocal room. Sound waves bounce off ceilings just as they do walls, with added noise pollutants of impact or airborne noises — walking, jumping, a falling object, loud music, etc. — from the upstairs. You can prevent these reflections and exterior sounds by adding a soundproofing layer above your ceiling, as well as additional acoustic-specific treatments.
4. Doors
Vocal booth doors are one of the most significant contributors to noise pollution. If you take a second to look at your door’s perimeter, you’ll notice gaps where exterior sounds can enter. And, if you take another second to knock on your door, you’ll likely hear the loud effects of its hollow core. Luckily, there are solutions to quiet this noisy culprit!
A bonus tip for vocalists creating their vocal room — ensure your door swings outward from the room. Otherwise, it could hit any soundproofing materials, people or instruments.
The 4 Best Acoustic Treatments for Vocal Booths
Our soundproofing experts at Soundproof Cow want to help you treat your vocal booth with the most effective, highest-quality soundproofing materials. Consider our top four options you can use in your acoustic vocal booth.
1. Acoustic Panels
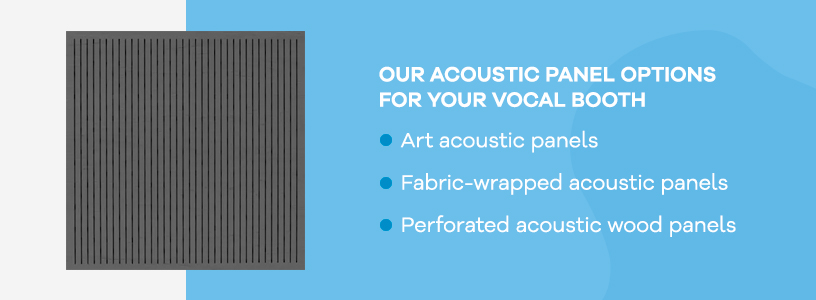
Soundproofing doesn’t have to be, or look, boring. Our acoustic panels consist of mineral wool or foam, materials known for their sound-absorbing qualities. We won’t get into the exact science behind what makes them so effective, but we’ll give you a quick look into our three acoustic panel options for your soundproof vocal booth.
- Art acoustic panels: Our fully customizable art acoustic panels allow you to soundproof your vocal booth without sacrificing its visual appeal.
- Fabric-wrapped acoustic panels: We make our fabric-wrapped panels to order. You can choose the perfect fabric wrap finishes, size and configurations to best match your vocal booth’s look and shape.
- Perforated acoustic wood panels: Particularly useful for musicians, perforated acoustic wood panels have dents that absorb and centralize soundwaves to lessen the noisy reverberation effects in your vocal booth.
Our acoustic panels are easy to install, especially when working with an acoustic specialist. Place these acoustic panels along your vocal booth’s walls, making sure they’re:
- Symmetrical.
- Spread out across the room.
- Evenly spaced.
- Not placed too high above eye level.
Learn more about what makes these acoustic panels so effective by visiting our website and watching our four-minute informational video!
2. Impact Barrier QT Flooring Underlayment
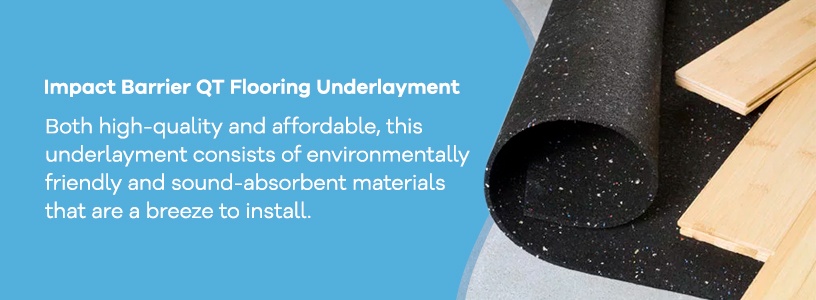
Our top choice for soundproofing floors is our Impact Barrier QT floor underlayment. Both high-quality and affordable, this underlayment consists of environmentally friendly and sound-absorbent materials that are a breeze to install.
To protect your vocal booth from outside noises, all you need is a utility knife, straight edge, tape measure and some duct tape for the seams. And, there’s practically no limit to the flooring you can protect, including carpet, tile, hardwood, laminate and stone!
3. Udderly Quiet® Acoustic Cloud
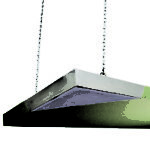
Add our lightweight hanging Udderly Quiet® Acoustic Cloud to your vocal booth ceiling to prevent any sound transfer or vibrations from sneaking into your recording. The newest addition to the Udderly Quiet® family, the Acoustic Cloud is a hanging panel that can fit in almost any vocal booth.
Visit our website and learn more about our Udderly Quiet® family of products and how our newest addition can make a difference in your vocal booth!
4. Quiet Door™ Perimeter Seal
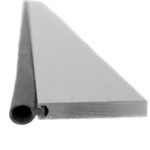
We recommend our Quiet Door™ Perimeter Seal for the stubborn areas around your wood or metal doors. Our soundproofing seal forms a tight fit around the perimeter of your vocal booth’s door to keep your recording audio crisp.
Like all of our products, Quiet Door™ Perimeter Seal features the highest-quality materials. Flexible silicone, heavy-duty aluminum and stainless steel hardware reduce sound, and will continue doing so for years to come.
Not Sure Where to Start? Visit Soundproof Cow for a Free Acoustic Analysis
Visit our website and tell our online sales representative more about your vocal booth and soundproofing goals, and we’ll “steer” you in the right direction. Or, for an even faster solution, give us a call at 866-949-9269. We’re here to help!
Learn More About Acoustic Panels


