There are 3.2 million active podcasts in 2024. With so many podcasts, recording one might seem simple with the Internet, a microphone, and great ideas. However, if you have been podcasting for a while, you know how challenging it can be to achieve good audio quality.
Notice how recorded audio might sound roomy and muffled? This sound quality is caused by reverb, which is reflected sound bouncing off different surfaces. Excessive reverb results in patchy audio that can be improved for a better listening experience.
If you are setting up a soundproof booth for podcasting, you need to reduce reverb on surfaces like walls and ceilings. To learn about improving audio quality, explore the basics of acoustic treatment and effective soundproofing materials for your podcast setup.
Understanding Acoustic Treatment and Soundproofing
Acoustic treatment refers to improvements made to enhance a room’s sound quality. Because each recording space is different, effective acoustic treatment involves room design and using materials that absorb and diffuse sound.
Here’s how to distinguish sound absorption from sound diffusion:
- Sound absorption: When sound travels through a wall with a porous material, it loses energy and weakens. The sound is absorbed and cannot escape the wall, resulting in a quieter space. Sound absorption materials like foam or fiberglass can be placed on walls and other reflective surfaces to keep sound waves from bouncing off.
- Sound diffusion: Sound that spreads from one area to another is called diffusion. When sound energy spreads out evenly in a room, it reduces reverb and produces good sound quality. A room with different angles and hard surfaces results in uneven sound diffusion and poor sound quality. Sound absorption materials can be placed in your room to manage uneven diffusion.
Now, think about your space. To improve sound quality, it helps to cover your podcast booth’s walls with thick materials like a curtain or blanket. You can also use acoustic panels, bass traps and diffusers to better manage how sound bounces inside a room. These materials reduce noise and reverb to help produce a clear and balanced sound quality for recordings.
How Is Acoustic Treatment Different From Soundproofing?
Soundproofing essentially contains sound within a space. When a room is soundproofed, external sounds cannot be heard inside, and sound from inside cannot be heard outside that space. Soundproofing works by using dense materials that create a solid layer between two spaces.
For example, a concrete wall with soundproofed insulation is denser than drywall. Sound energy weakens and cannot pass through it. If you want a well-soundproofed room, consider constructing your podcast room’s walls with thick, soundproofed material.
What if I want to soundproof an existing space? Soundproofing materials such as high-performing soundproofing barriers, flooring underlayments and sound-blocking door sweeps can help confine sound in a room. You can get your podcast soundproofing kit at Soundproof Cow — we offer a free acoustic analysis!
Setting up a Podcast Studio at Home
Creating a successful home recording studio involves more than using quality computers, microphones and cameras. While equipment is important, podcast room design is a critical factor that impacts your studio’s sound quality. Use acoustic treatment and soundproofing materials to set up an existing space or create a new room.
Acoustic Treatment for Your Podcast Room or Booth
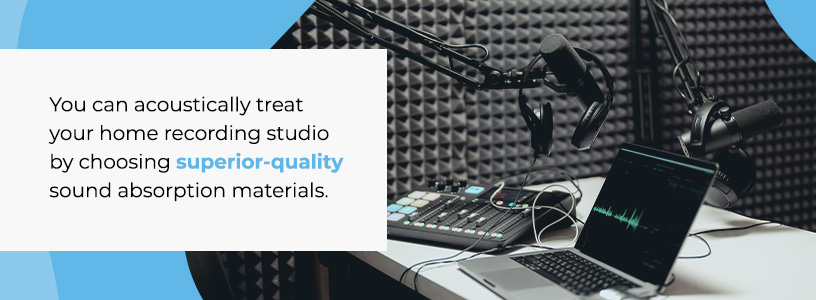
You can acoustically treat your home recording studio by choosing superior-quality sound absorption materials. Be sure to place your materials in the best spots to control and reduce reverb in your podcast studio.
We recommend the following sound absorption materials:
1. Acoustic Foam
Acoustic foam panels are a lightweight, cost-effective solution for covering the surface of your podcast studio walls. For optimal results, install acoustic foam panels in a checkerboard pattern, with each pattern directly across a blank space on the opposite wall. This strategic layout helps increase surface coverage to reduce echo and reverb.
Check out Soundproof Cow’s Udderly Quiet® Pyramid Acoustic Foam. Its pyramid-shaped foam maximizes sound absorption and is an excellent acoustic treatment for open spaces. It is ideal for both home podcast enthusiasts and professional recording studios.
2. Acoustic Panels
Ceilings are another reflective surface that needs to be covered to reduce reverb. Acoustic panels are usually larger than acoustic foam and can be mounted or hung on ceilings, making them a versatile choice for acoustic treatment and soundproofing for podcasters.
Choose stylish Art Acoustic Panels from Soundproof Cow to minimize reverb and noise while adding character to your studio. Our Art Acoustic Panels are custom and made to order, allowing you to take your images and place them on a fade-resistant, fabric-wrapped acoustic panel.
3. Bass Traps
Bass traps are installed to reduce low-frequency sound waves that travel farther and penetrate through walls. For the most effective sound absorption, bass traps are strategically placed in the corners of a room — which is why they are also called “corner traps.”
Control low-frequency sound in your home studio with Soundproof Cow’s Udderly Quiet® Corner Traps. These studio-quality foam wedges manage unpleasant reverb caught in the corners of your recording space. Improve sound quality with permanently mounted or freestanding corner traps for your home studio.
Soundproofing for Your Podcast Room or Booth
Soundproofing materials are strategically placed to confine sound and enhance your room’s audio quality. You can do this for an existing room or when building a new one. For more effective soundproofing, consider installing soundproofing material in new construction.
Choose from the following soundproofing options:
1. Acoustic Insulation
Installing acoustic insulation in your walls traps sound waves and reduces noise and reverb. The thickness of the insulation makes it harder for sound waves to pass through the wall. Sound waves that travel through acoustic insulation are caught by dense fibers, weakening sound energy. As a result, less sound passes and escapes through your podcast room’s walls.
Contain sound in your home studio with Quiet Batt® Soundproofing Insulation from Soundproof Cow. Made with 80% recycled cotton fibers, it provides excellent soundproofing and heat insulation.
2. Soundproofing Barriers
Soundproofing barriers prevent loud external sounds from disturbing your podcast. These acoustic barriers are often made with dense layers of foam, vinyl, or fiberglass to fend off and reduce external noise. Sound barriers can have an adhesive that easily sticks to drywall, pipes and other surfaces that reflect external noise.
You can use Soundproof Cow’s Soundproof Foam Composite Barriers for your home studio. They help deflect external noise, such as ringing phones, traffic and other distracting sounds while recording your podcast.
3. Soundproof Flooring Underlayments
Flooring can transmit loud sounds from people passing or moving in rooms. Soundproof your recording space with flooring underlayments that can be fitted under tile, carpet, rug, laminate, hardwood and stone floors. These effectively reduce sound vibrations and keep sound from penetrating your room’s floor.
You can manage floorboard vibrations with Impact Barrier QT™ flooring underlayment from Soundproof Cow. It is made of 92% recycled rubber and can be easily cut to fit in any space.
Trust Soundproof Cow for Superior Soundproofing Materials
When it comes to setting up your podcast home studio, Soundproof Cow is your reliable partner for all your soundproofing and acoustic treatment needs. We offer a wide range of sound absorption options to help you design a quiet and conducive recording space.
Ready to take podcasting to the next level? Contact us for a free acoustic analysis and let us make your home recording studio a reality.


